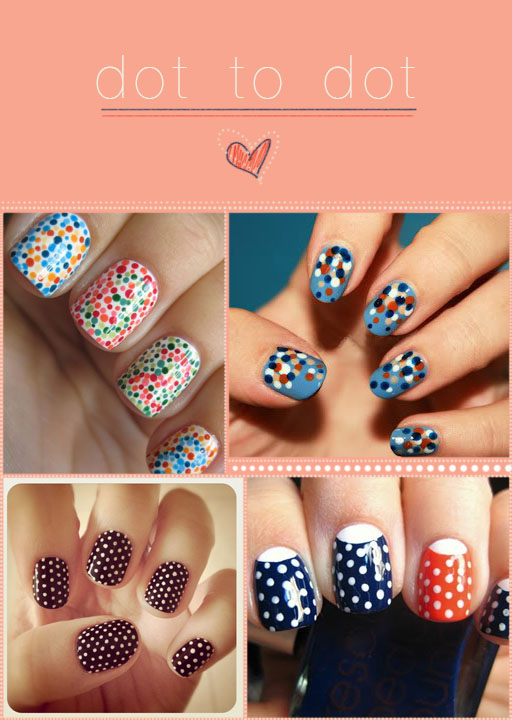
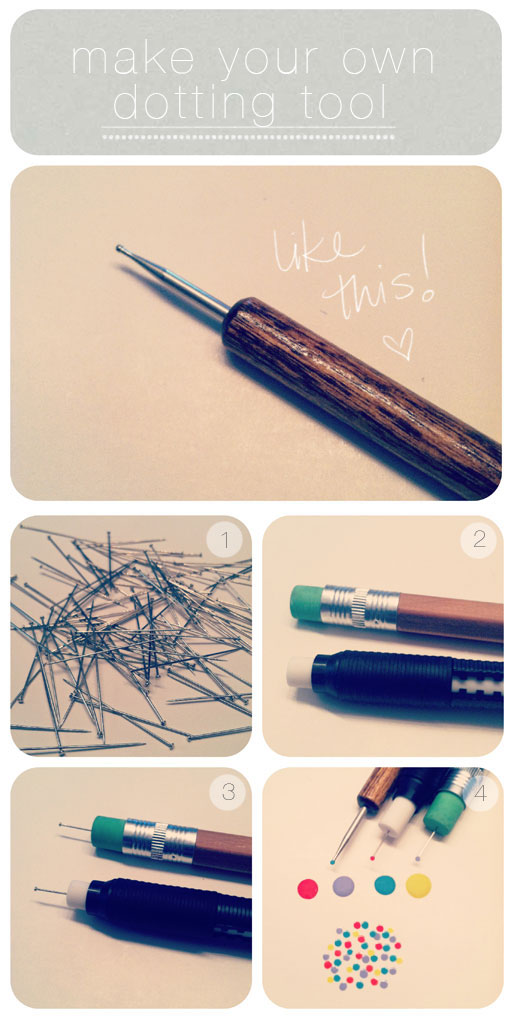
So many dots, so little time. Between the nail pictures you send us + the nail tutorials seen on Pinterest, we have noticed that polka dots are a major favorite right now. Getting those perfect little circles isn’t easy unless you have the right tool– the dotting tool. You can buy them at beauty supply stores and you can find similar tools at art supply stores… or better yet, you can simply make your own using things you most likely have in your house already. Here are the steps!

- Get a straight pin. You’ll notice there are different sizes when you’re at a fabric store (we used superfine for this).
- Get a number 2 pencil with an eraser or one of those retractable erasers as seen above.
- Insert the pin into the eraser. Try to keep it straight. If you push it into the eraser and notice it’s crooked, just bend it a little to center it. That will insure you get a perfect dot every time.
- Dip + dot!

i am pretty much a-LOVIN' this tutorial! it's amazing & i want to try it when i get a wild hair!
OOOOOOOOR TRY THIS OTHER ONE!!!
Cheetah print nails have been around for some time now but we’ve never actually done a tutorial on them. We got a lot of requests after last week’s Mani Monday heart tutorial, so we’re going for it!
TOOLS: 2 toothpicks, black nail polish (American Apparel “Hassid”), gold nail polish (American Apparel “Gold Flash”), clear coat.
PREP: Use any color your want on the base of your nails. Make sure they’re fully dry before starting on these spots.
- Take your toothpick and tap it on the table or counter a few times to flatten out the tip. That will make your toothpick more like a dotting tool. Flattening the tip will help you pick up a little more nail polish.
- Create 2 little puddles using the gold and black. (Dipping your toothpick in the nail polish bottle is quite messy + you don’t want to leave your nail polish bottle open for too long either.)
- Dip your toothpick into the gold and make a messy oval “blob” shape on your nail.
- After the gold dries, surround them with black. Leave an opening between the black here and there.
- Now let’s see it closer up! Free-hand a gold “blob” shape.
- After it dries, take black and start surrounding the shape on one side. Think of it like putting messy parenthesis around your gold blob.
- Now do your messy parenthesis shape on the other side. You can even join them together on one side if you want.
- Do assorted shapes. Leave various gaps in the black polish. None of the spots should look the same. Once everything is dry, go over the spots with a top coat.


No comments:
Post a Comment
please leave me a little sunshine! :) i love hearing from you!